Results
Introduction
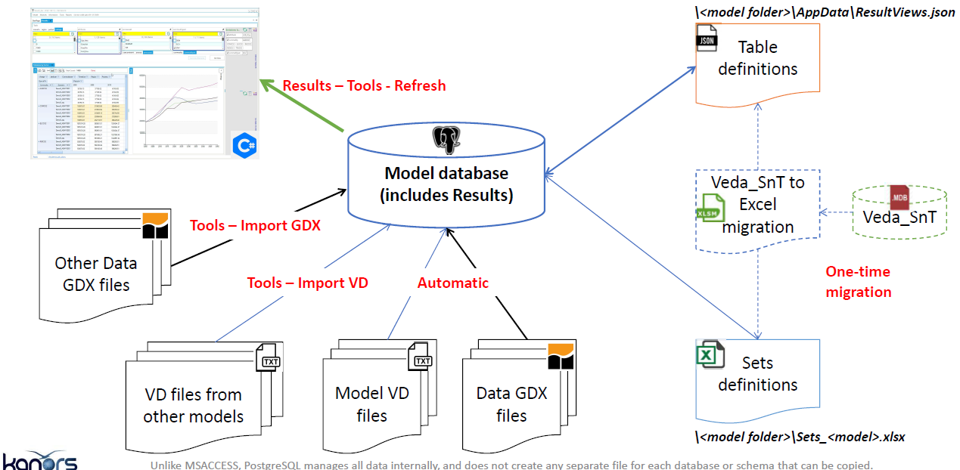
Used to analyse TIMES model results. Results are all stored in the model folder (e.g. DemoS_012) and belongs to that model
Model VD files: model results (VD files) are included automatically in the model database at the end of a successful run (e.g. VedaGAMS_WrkTIMESDemoS_012).
Results browsing: to view (and refresh) model results through dynamic pivot tables (cubes)
- Table definition: user defined tables for a specific model
(<model folder>/AppData/ResultsView.json)
Batch export: to export results in excel and CSV.
How to use it?
1. Operations
The Operations menu contains actions related to result processing and case management.
Process Results
Process Results reads the VD files and processes all cases for the current model.
Delete Cases
Delete the saved cases in the current model.
2. Views
The Views option is used to manage saved views.
Use Views to open the Views window and maintain saved configurations.
Saved views help users quickly reuse previously defined layouts, filters, and analysis settings without repeating the full setup.
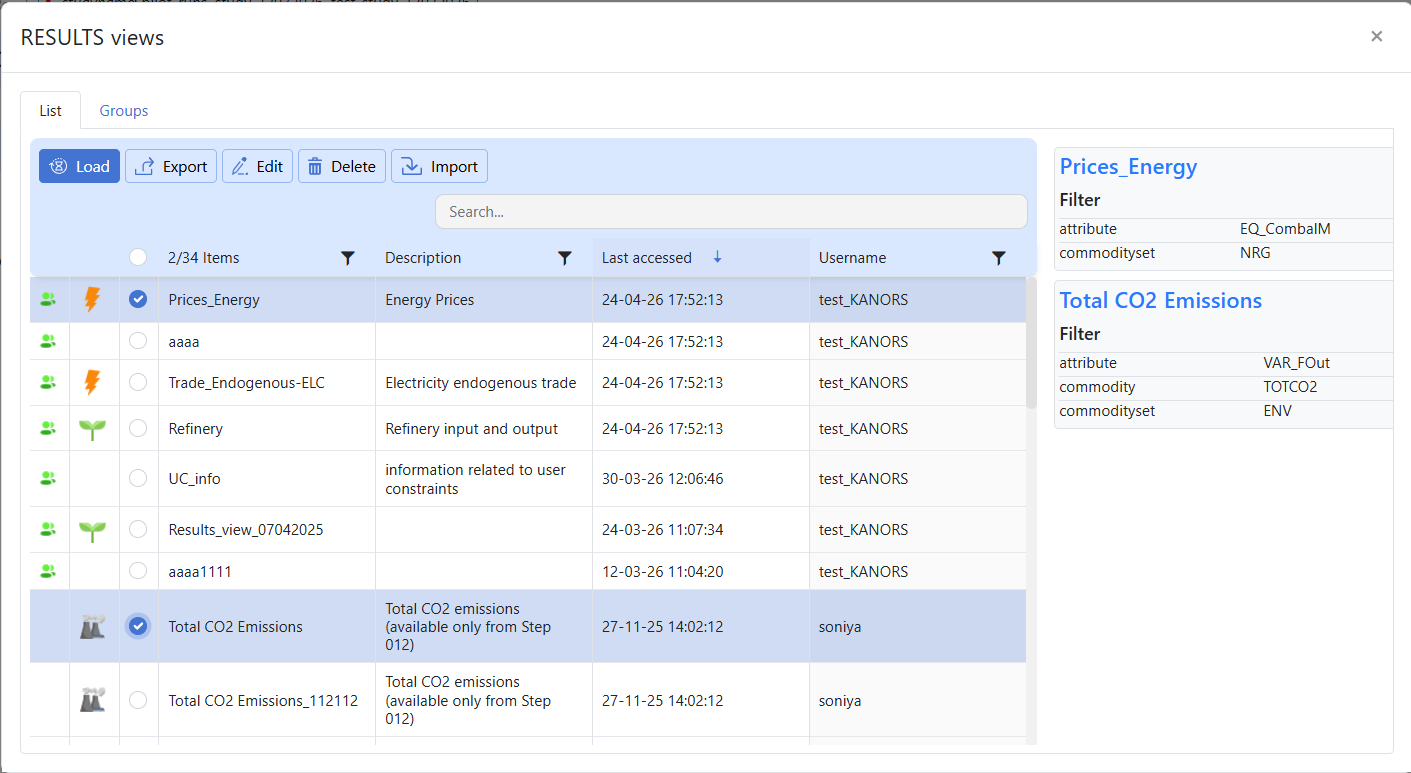
- The Views window contains two main sections:
Views List: shows individual saved views and lets users load, edit, export, delete, or import them.
Views Groups: shows collections of saved views so related analyses can be organized together.
Note
Use List when you want to work on a specific saved view.
Use Groups when you want to manage related views as a collection.
- Views List
The List tab shows the available saved views. From this section, users can select a saved view and perform actions such as Load, Export, Edit, Delete, and Import.
- Load
Use Load to open a previously saved view.
Click Views.
Stay on the List tab.
Select the required saved view.
Review the saved filter summary shown in the details panel.
Click Load.
- Export
Use Export to export a saved view for download.
Click Views.
Stay on the List tab.
Select the required saved view.
Click Export.
Choose the required download format such as CSV.
Confirm the export action.
The exported file will be available in the Jobs Dashboard.
- Edit
Use Edit to modify an existing saved view.
Click Views.
Stay on the List tab.
Select the required saved view.
Click Edit.
Change the required filters.
Click Update Filters.
Confirm the update.
- Delete
Use Delete to remove a saved view.
Click Views.
Stay on the List tab.
Select the required saved view.
Click Delete.
Confirm the deletion, if prompted.
- Import
Use Import to bring saved views from another model into the current model.
Click Views.
Stay on the List tab.
Select the required saved view.
Click Import.
Select the source model.
Review the available views.
Select the required view or views.
If needed, also select the required group of cases.
Confirm the import action.
Imported views will appear in the Views List with shared icon.
Imported groups will appear in the Manage Cases section of the Run Manager, marked with the shared icon.
- Views Groups
The Groups tab displays saved view groups, where available. This section is used to organize and manage views in grouped form.
Note
The right-side details panel helps users review saved filter information before loading, editing, exporting, or deleting a view.
Imported views behave like regular saved views after import.
Export runs as a background job, and files are downloaded from the Jobs Dashboard.
Use Edit to update an existing saved view, and Load to open it without making changes.
A collection of saved views is called a group.
The Groups tab is used to view and manage groups.
Groups help users organize related views for easier reuse.
3. Reset
The Reset option clears the current result selections and removes the applied filters from the page.
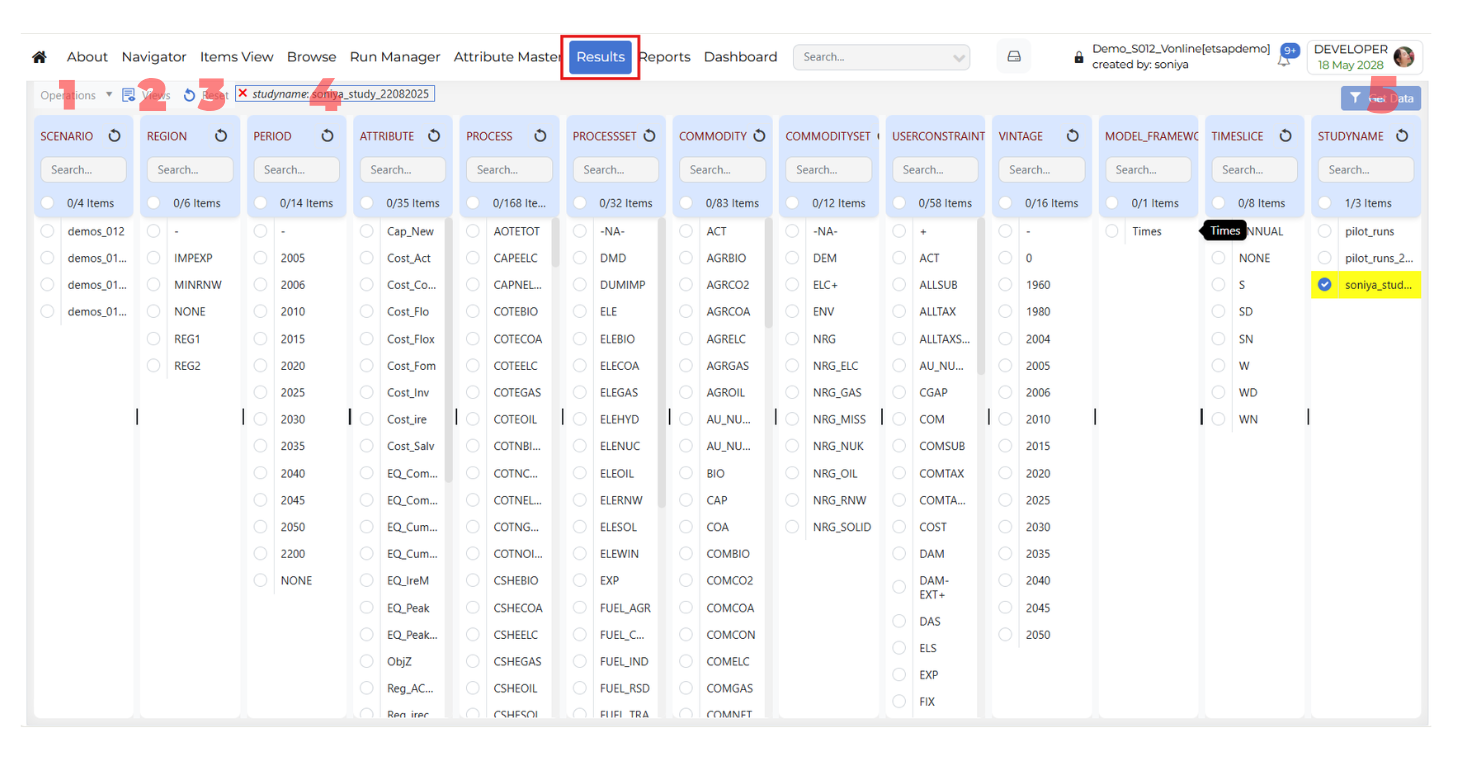
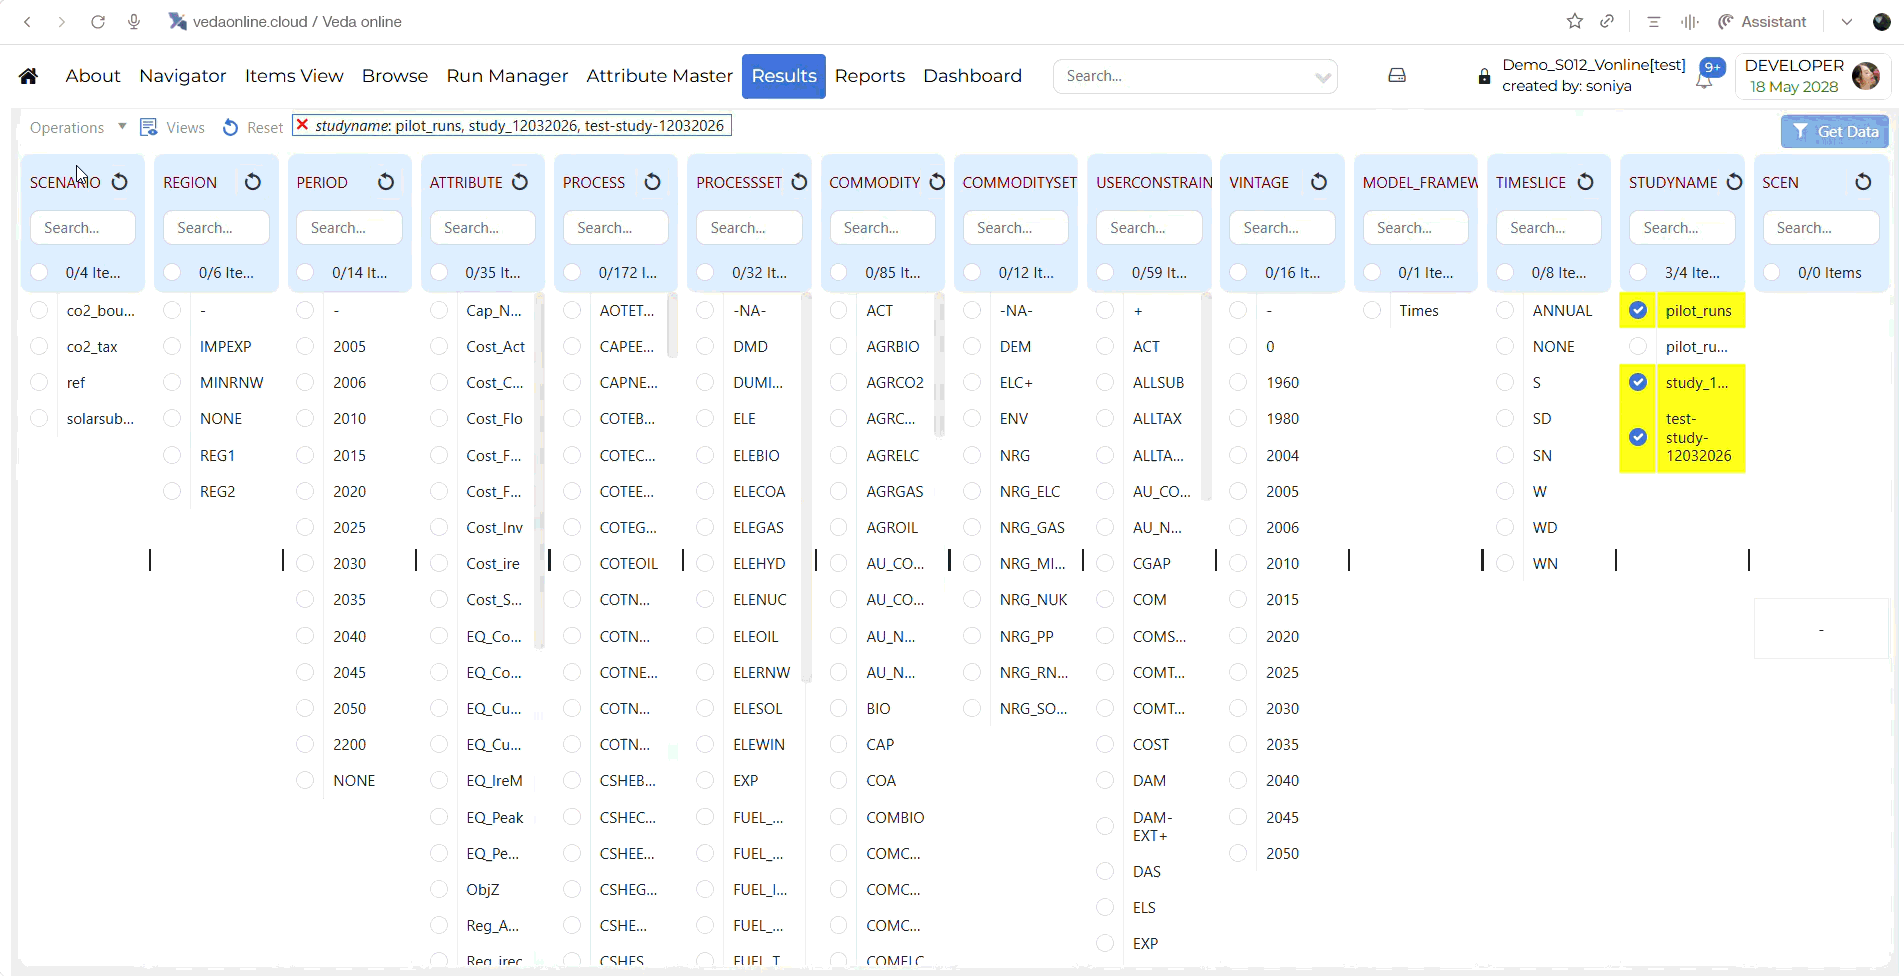
4. Global Filters
The Global Filters default applies to the latest study.
When a row in the Results grid is highlighted in yellow, it means that a global filter is applied to that row.
Press the Ctrl key and click on the row to apply the filter to the row.
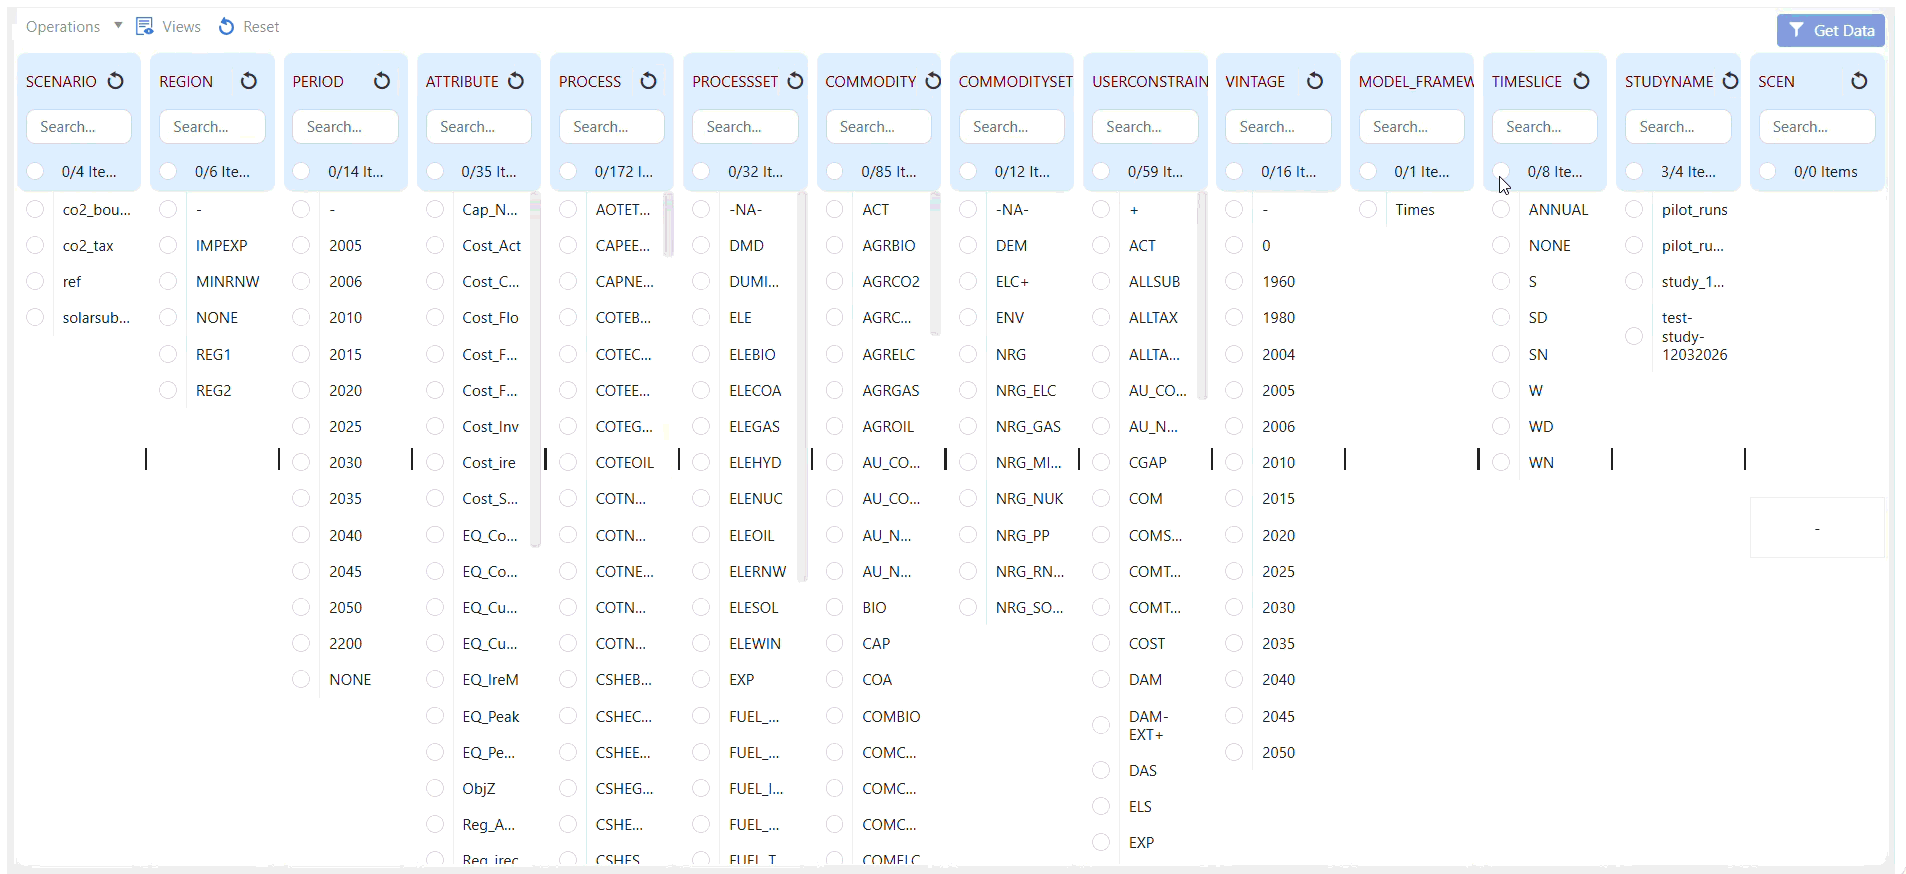
5. Get Data
The Get Data button retrieves data based on the selected global filters. Use it after selecting the required values in the filter panels.
When a user clicks Get Data Pivot Grid.
Right-click Functionality
The Results module includes right-click functionality for selected dimension items. This shortcut menu allows users to quickly open related actions for the selected item without changing the main Results workflow.
Dimension-specific behavior
The right-click menu is not the same for every dimension.
- For PROCESS and COMMODITY dimensions, the right-click menu includes the following options:
Items View
Show Detail
ExRes
- For ALL other dimensions, the right-click menu includes the following option:
Show Detail
Items View: Opens the selected item in Items View modules.
Show Detail: Opens an information dialog for the selected value (for example,
period - 2015 informationorprocess - COTEELC information).Exes:
Note
Coming soon. This section will describe the Exes functionality in Results.